Authentication with Firebase on iOS
Published on December 6, 2022
Firebase is a powerful tool that enables mobile engineering teams to launch an app with a fully featured backend, without managing servers or writing a single line of server-side code. It's an excellent companion for getting apps to market quickly, and allows for rapid product iteration. All that simplicity and time savings requires just a tiny bit of setup between your Xcode project and Firebase account. Let's walk through getting your backend connected, step-by-step:
Contents
# Step 1: Install the Firebase SDK
The Firebase SDK can be integrated using any of the popular iOS package managers, however we recommend using the Swift Package Manager which is included with Xcode by default.
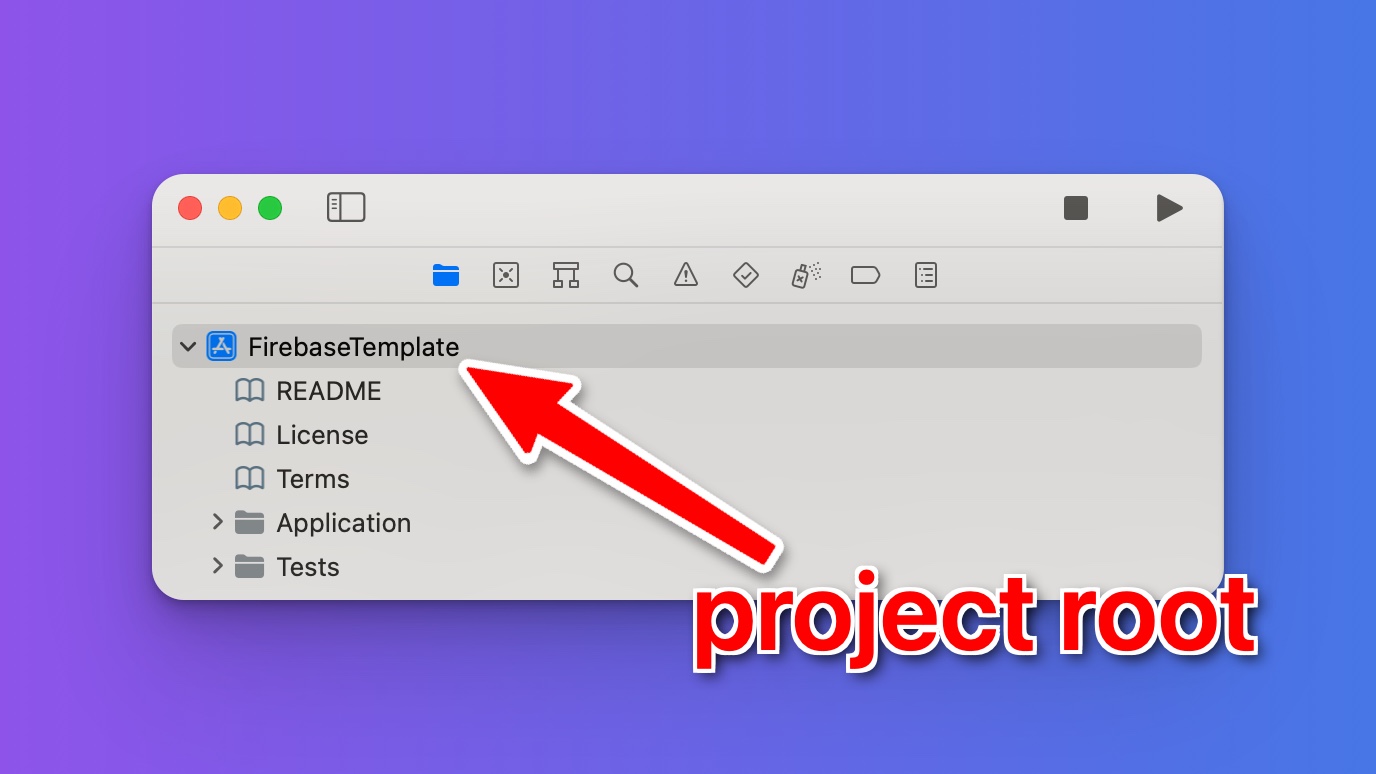
- Navigate to your project's root node, in the Xcode directory pane.
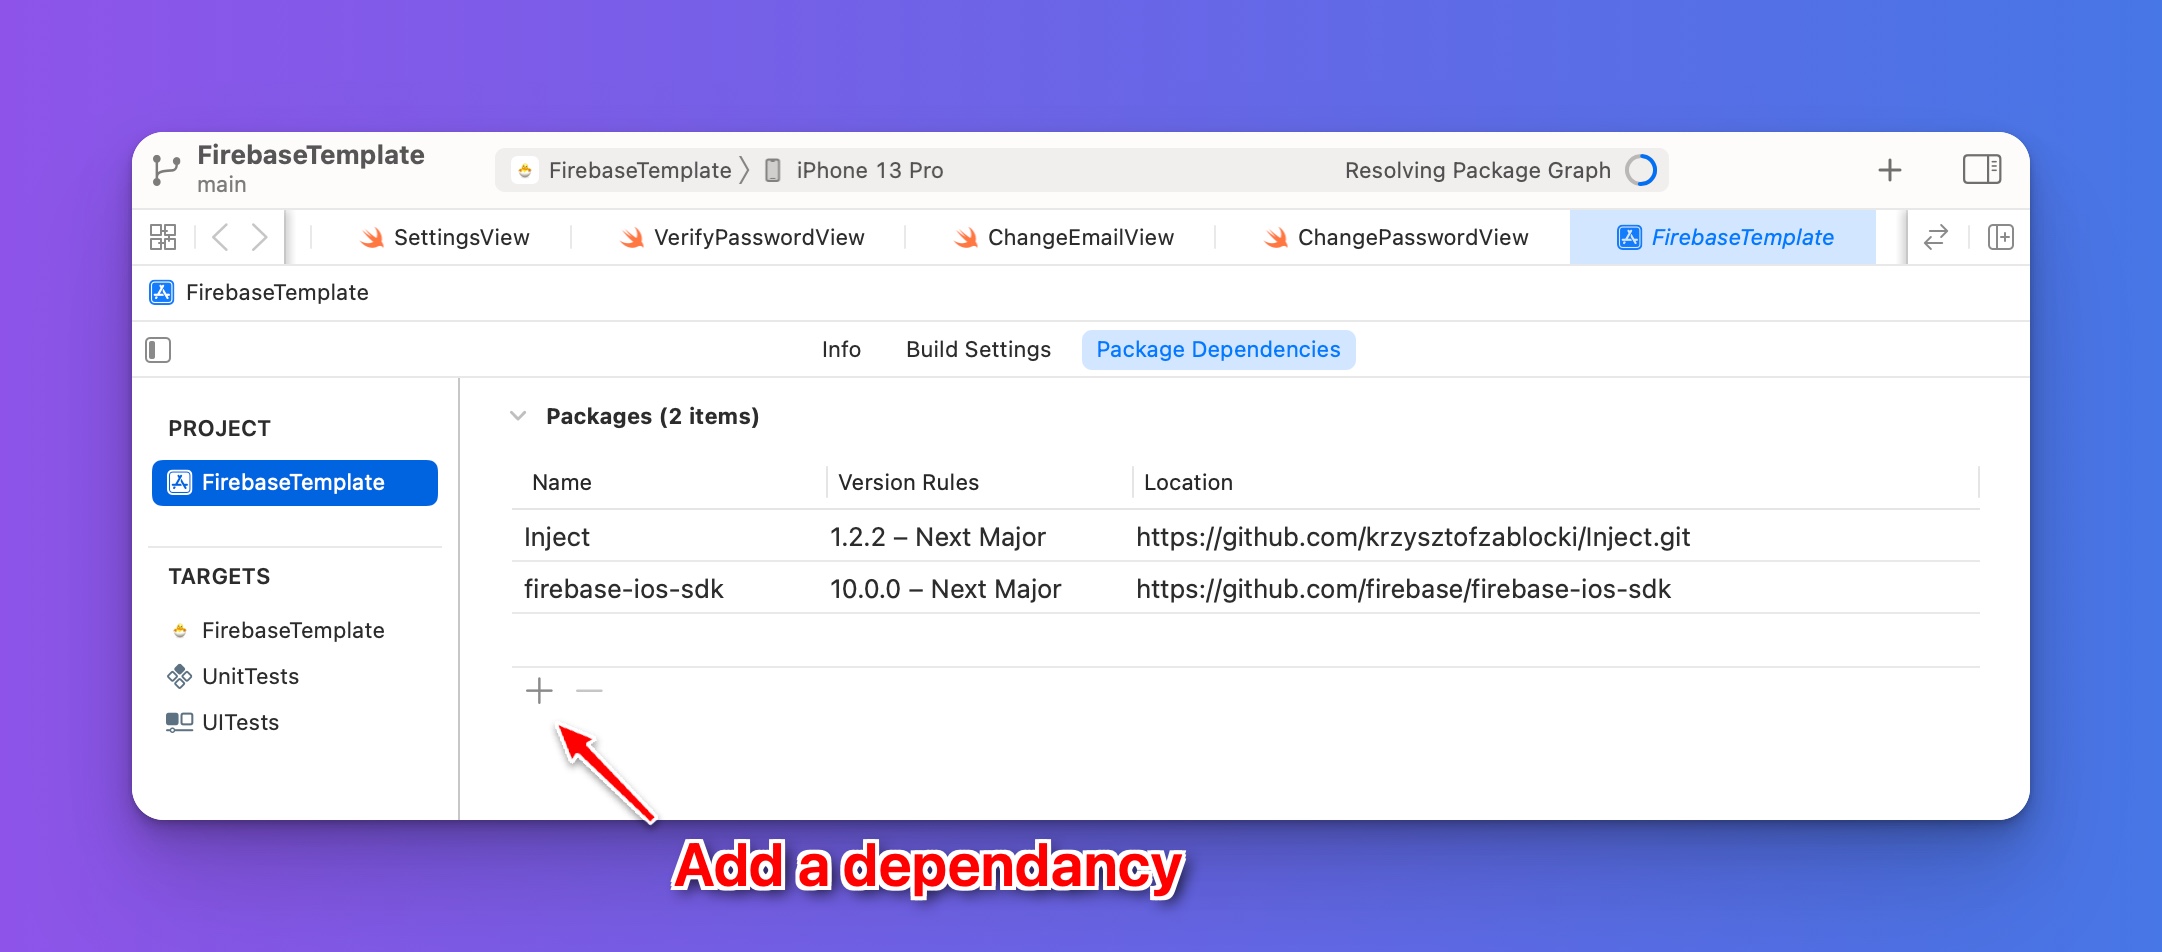
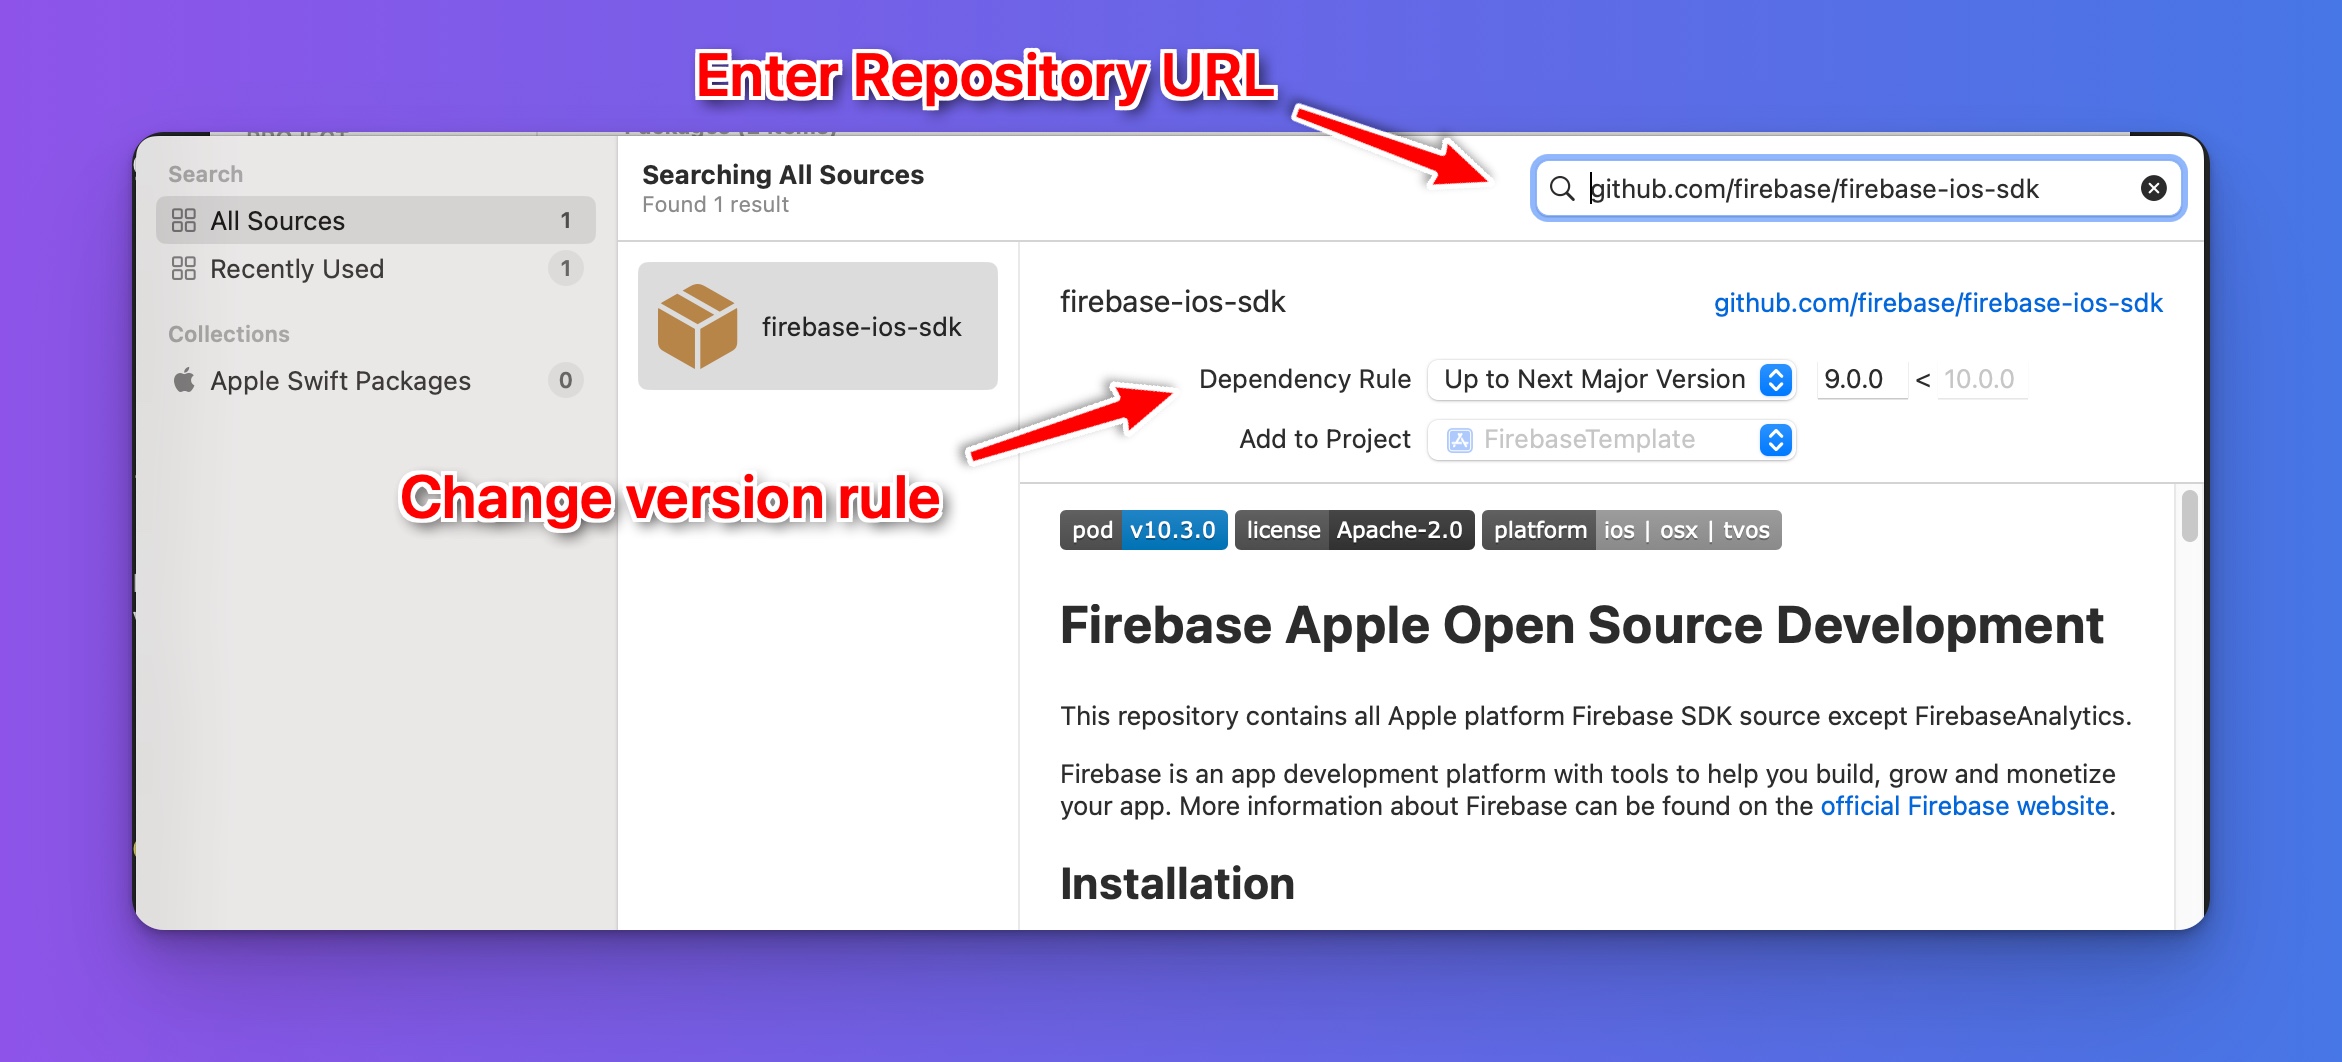
- Under "Package Dependancies" add the Firebase iOS SDK by specifying the repository URL (https://github.com/firebase/firebase-ios-sdk) and version rules (10.0.0, as of this writing).
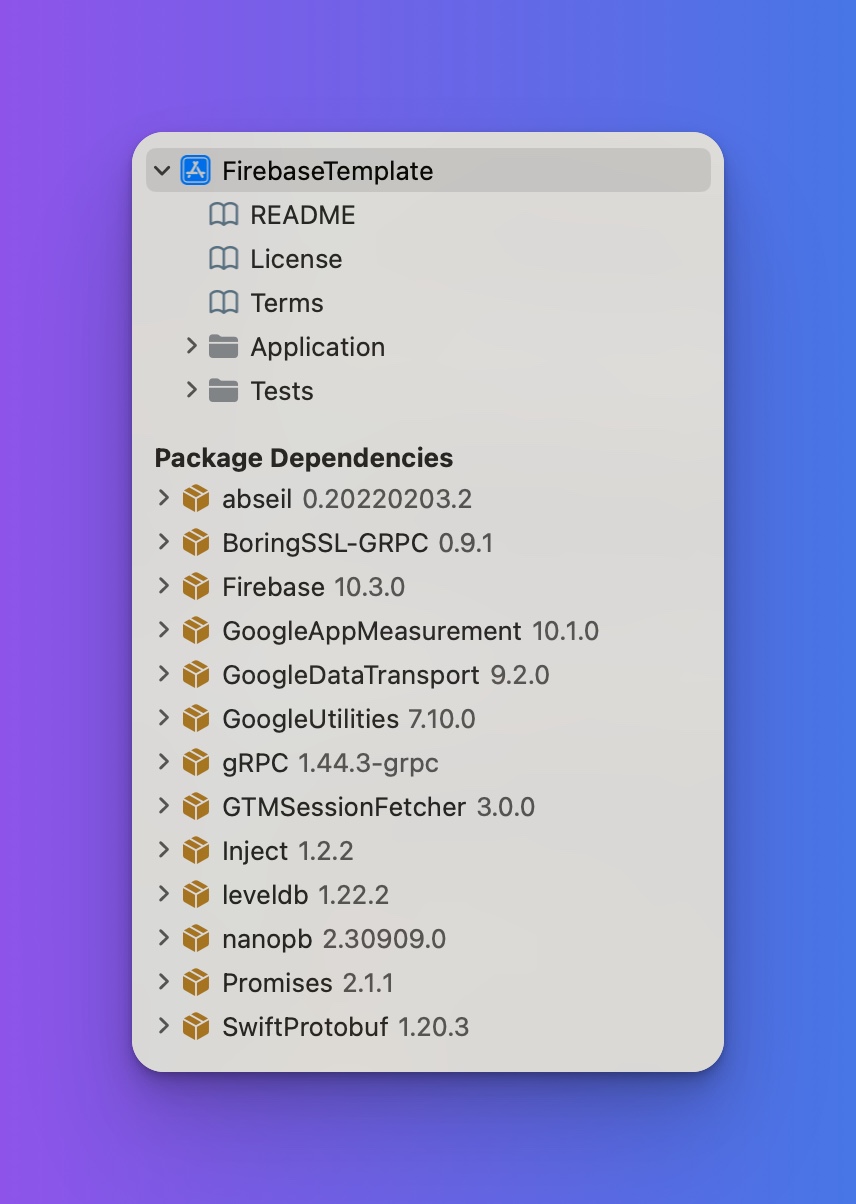
- Firebase and its dependancies may take a little bit to download, expect several packages to be installed alongside Firebase:
# Step 2: Ensure the Firebase library is linked
Library linking probably happened automagically, but lets double check.
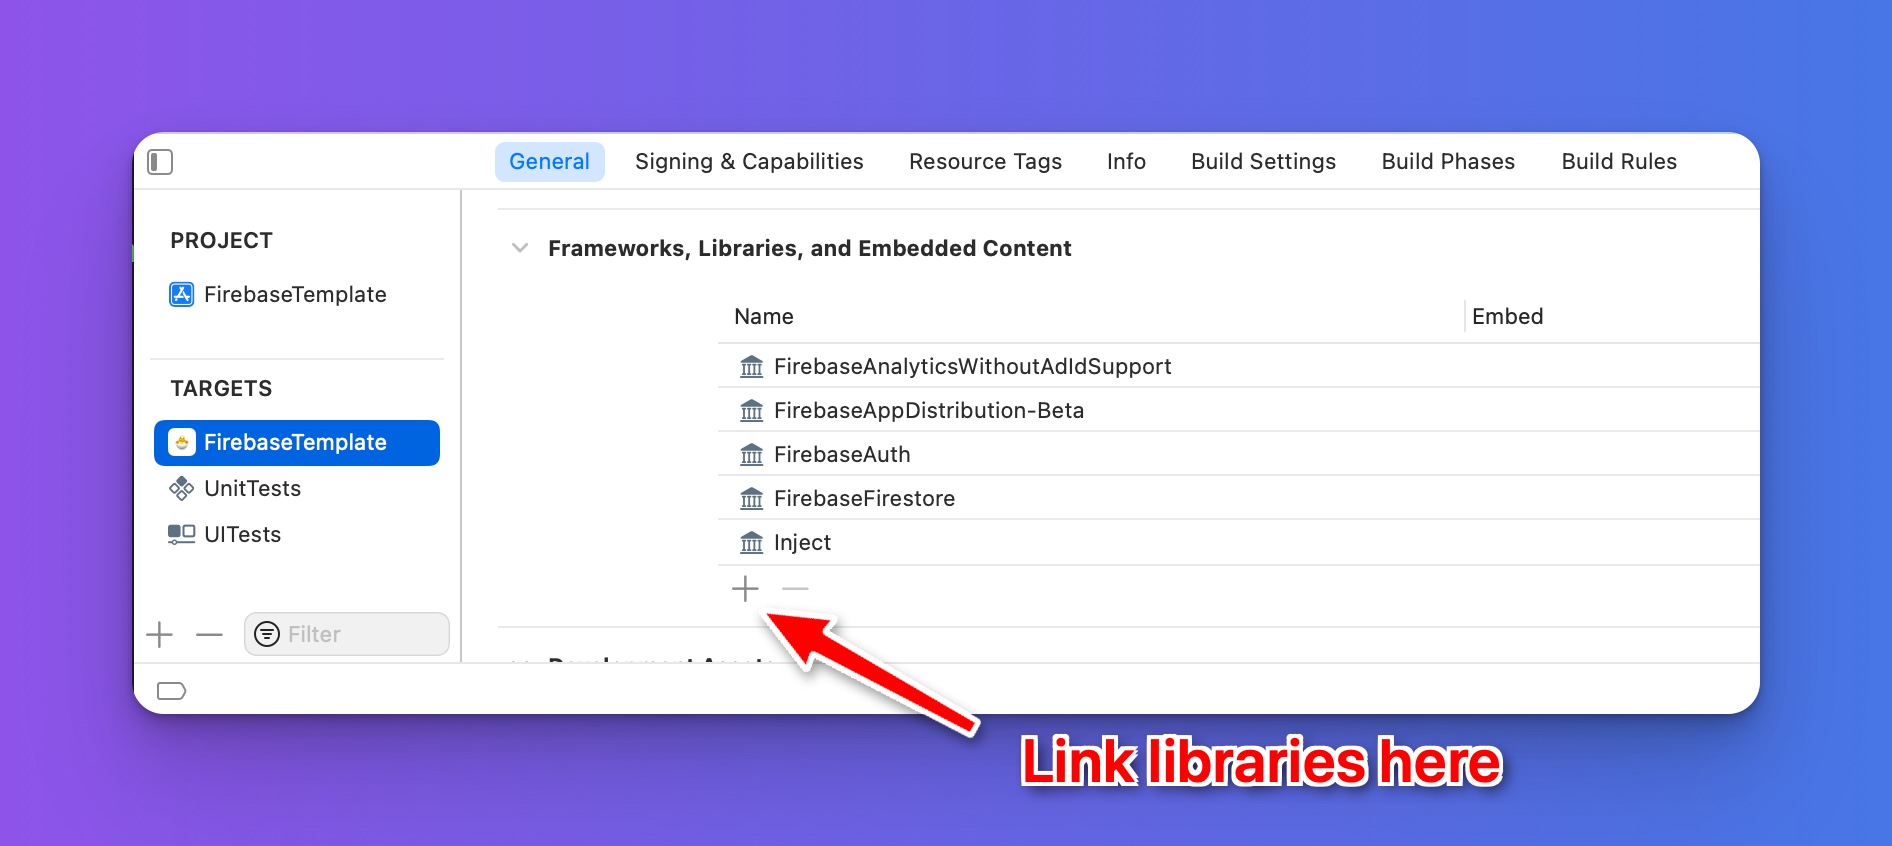
In the Xcode project pane, select your build target and navigate to the "General" tab. Scroll down to the "Frameworks, Libraries, and Embedded Content" section. Ensure the "Firebase Auth" and "Firebase Firestore" libraries are added, along with any of the other Firebase libraries that you might need (You can always add more later, there are lots of useful tools at your disposal).
# Step 3: Create a Firebase project in the Firebase Console
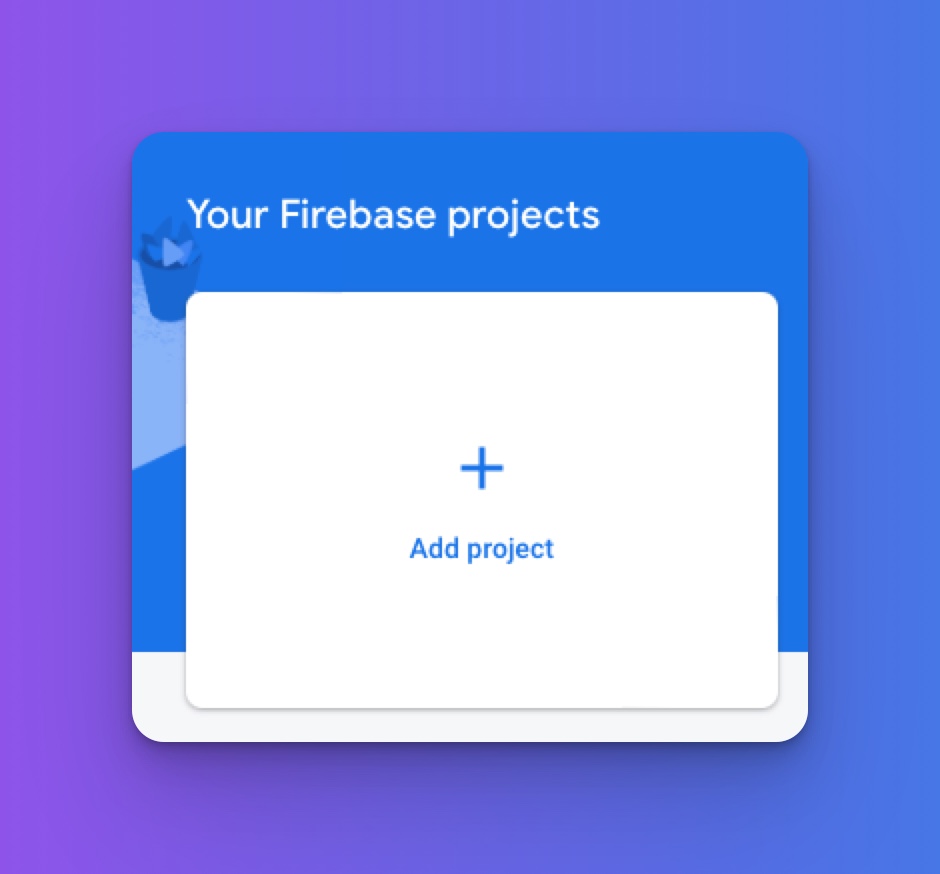
Next, we need to link a Firebase project to our app. Navigate to the Firebase console and add a project (Or use an existing one).
Follow the on-screen instructions, which will guide you through creating your Firebase project.
# Step 4: Add iOS app to the Firebase project
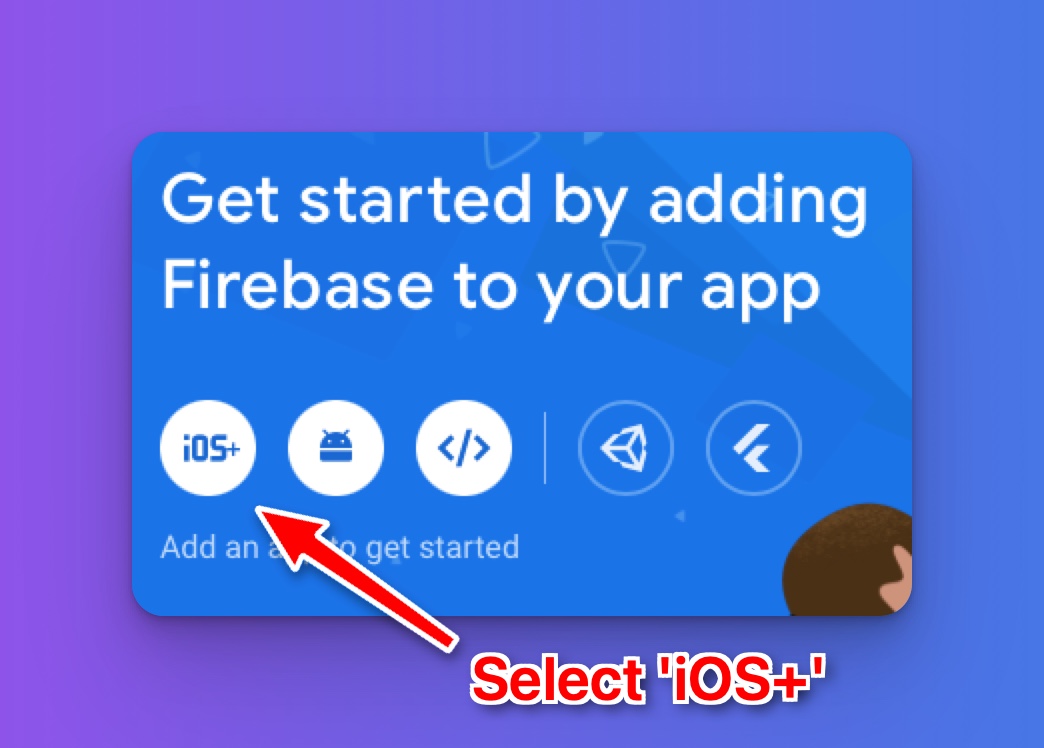
Once your Firebase project has been created, you will need to add your iOS app to the project. In the "Adding an app" section, select the "iOS+" option.
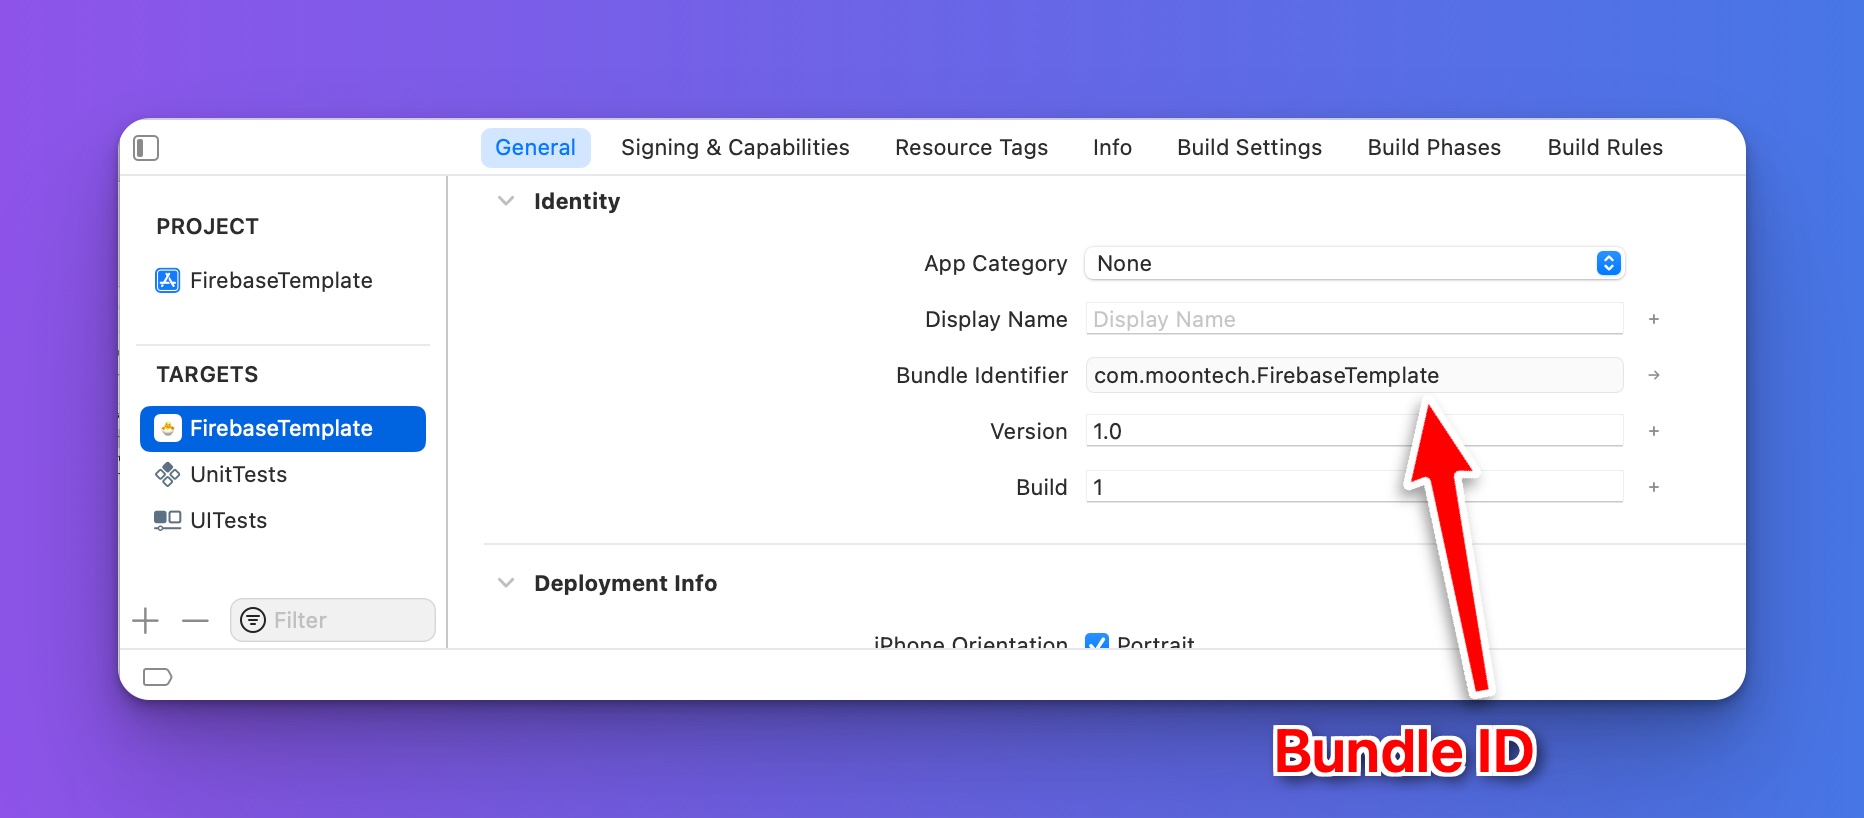
In the resulting walkthrough, you will then need to provide your app's bundle identifier. You can find this in your Xcode project, by navigating to the project target's "General" section.
# Step 5: Installing the Firebase Info.plist file
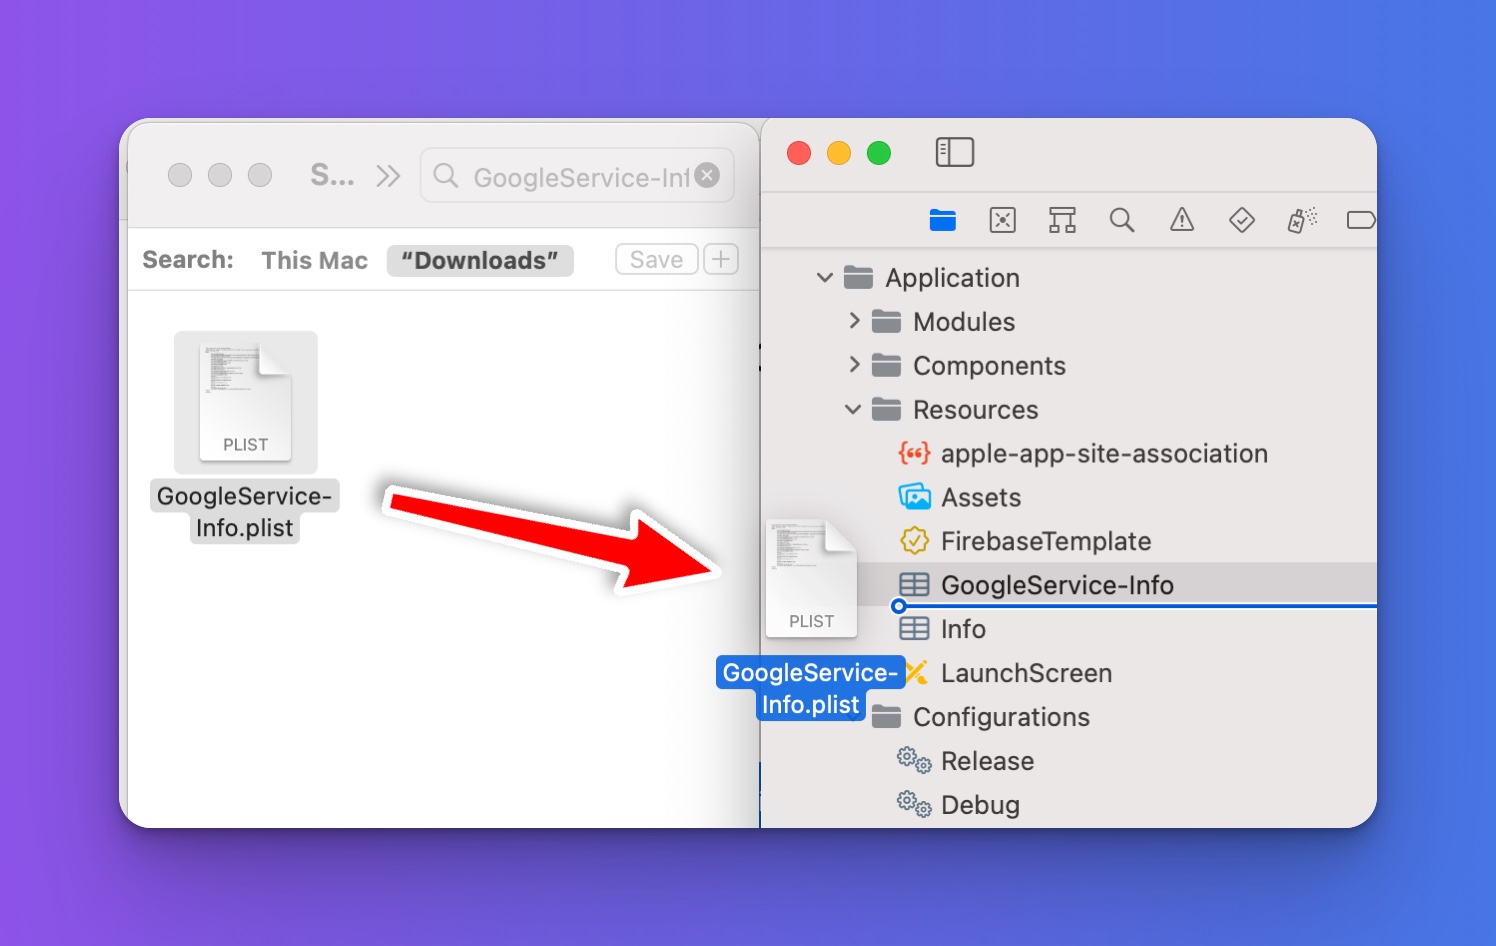
Once your Firebase project has an iOS app associated with it, you will be given a file titled "GoogleService-Info.plist". Download and drag this file into Xcode. We recommend placing it into a "Resources" folder, or similar.
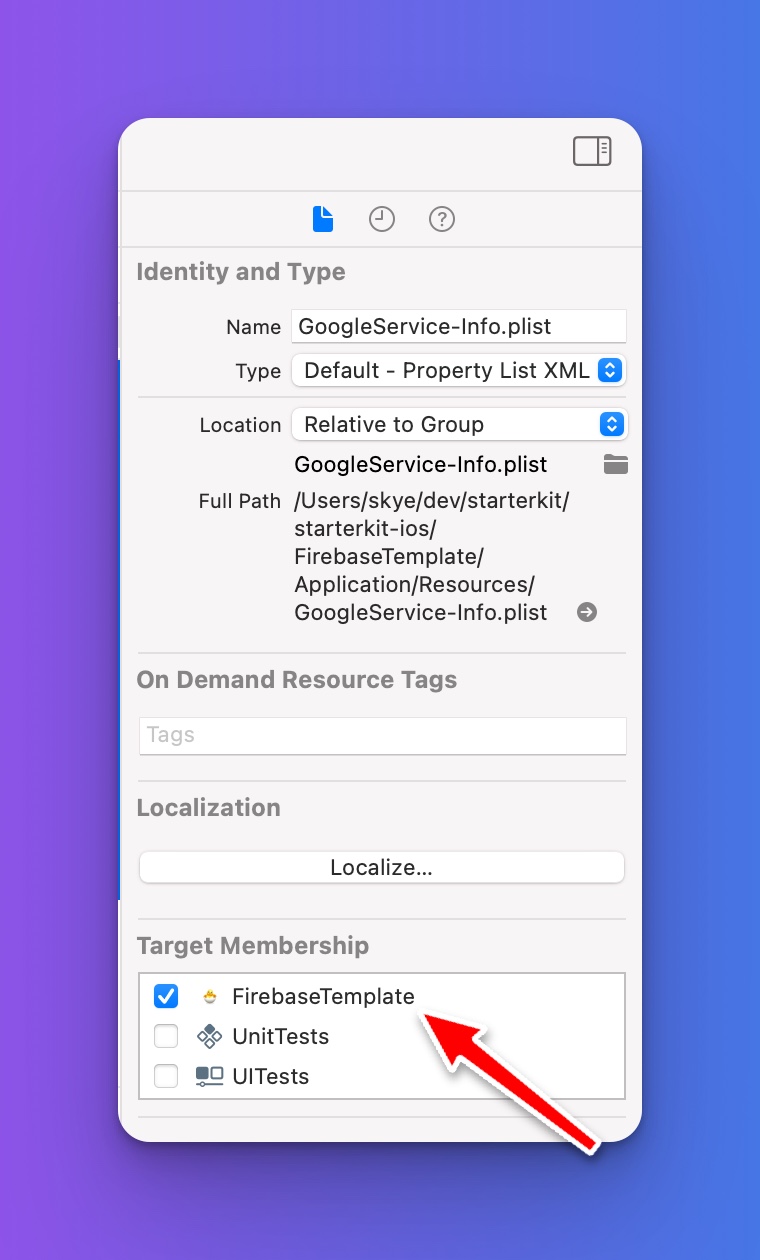
Ensure that the plist file is added to non-test targets (or all targets, if you know what you're doing).
# Step 6: Initialize Firebase in the AppDelegate
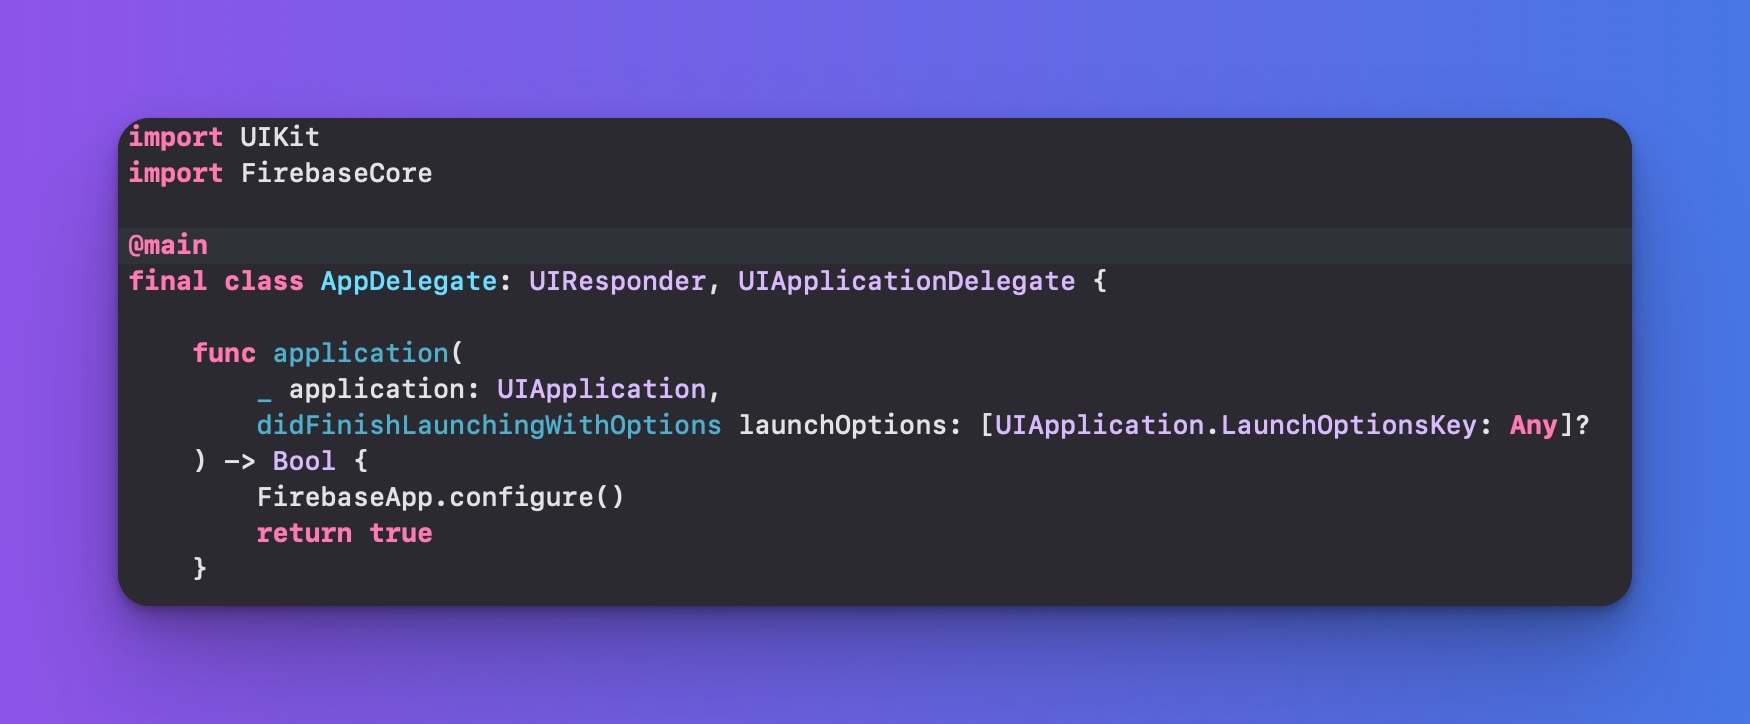
Navigate to your applications AppDelegate (If you're using SwiftUI and don't have an AppDelegate quite yet, you'll need to create one now). Import FirebaseCore and add a static function call to FirebaseApp.configure() within the AppDelegate's didFinishLaunchingWithOptions function. This ensures that the Firebase SDK configures itself at application launch.
Done. Hopefully.
At this point, Firebase should be fully connected! Try to build and run your project. If issues occur, use the console and any build warnings/errors as clues. As always, your search-engine-of-choice is your friend when troubleshooting dependancy issues.